In the next two posts in our series we will be shedding some light on how to physically get your fence up. In this post we’ll be explaining how to put up a standard lap panel fence (assuming you’ve put up the posts already – see our guide to setting in fence posts earlier in the series).
The most important thing to remember when erecting your fence is that you need to stop the panels from rotting – and ruining all your hard work! To do this you either need to raise each panel at least 10cm from the ground level (not always a sensible route to take – especially if you have pets!) or use a gravel board at the base of each panel. Gravel boards come in different materials but the main two are concrete (the more expensive option at about £10-£15 per panel depending on the depth you choose) and pressure treated timber (these cost about £4 per panel) which does not have quite the longevity of concrete but gives a warmer look and is cheaper.

Your choice of gravel boards will also be dependent on your posts – if you have concrete posts it seems sensible to use concrete gravel boards and they can be easily slipped down in the grooves on the sides of your posts (if you don’t have slotted posts you will need to use an angled cleat to secure a concrete gravel board which can be purchased from DIY stores). Contrastingly, if you want to use concrete gravel boards with timber posts you will need to either use cleats to secure the boards or place wooden battens either side along the length of your posts to slide the boards between. All in all – probably best to use timber gravel boards with timber posts and concrete boards with concrete posts!
If you have chosen to use concrete posts then this part of erecting your fence is pretty simple – first slide the gravel boards down in the slots in the posts, then slide in the fence panel after. Repeat for each panel and job done!
If you’re using wooden fence posts then there are a few more steps required to get your fence secure. As there is no slot for your fence panel you need to use 2 or 3 U-shaped fence post clips on each side of each panel. These are a simple U-shaped piece of metal which screws first into the fence post and then wraps around the panel and is screwed in on each side. Using a total of 6 clips per panel will give you a firm finish and a strong fence. Be sure to always use stainless steel screws to prevent rusting which can cause damage to your fence and looks unsightly too!
If you’ve used wooden fence posts then once all your panels are attached you can trim the posts so they are all the same height – if you’re going to use post caps then you can cut them straight but if not it’s a good idea to cut them on a slight angle so that the rain will run off and not sit on top. One other thing to remember is if you’re fitting your fence on a slope, try to keep your panels vertical and adjust for the slope by cutting yourgravel boardd to fit or by using several gravelboards.
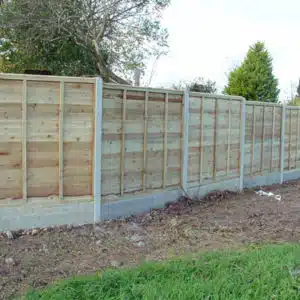
Voila! One fence in position, ready to be protected to last for years!
Image credit to Armcon Precast
Please note that Owatrol UK can take no responsibility for the advice offered on this page. Before you begin any DIY project you should be aware of any possible health and safety issues – if in doubt seek professional assistance. If you are unsure then please get in touch with you and we can provide assistance where possible.
We hope this post on erecting a lap panel fence interesting. If you have any other advice or top tips, please feel free to leave them in the comments below. We love hearing from you!
You can also follow us on Twitter, Facebook, Instagram or Pinterest at @OwatrolUK or find us under the hashtag #OwatrolUK
About Owatrol Team
Our team are ready and willing to support you with your requirements whether it is protecting your newly laid deck or renovating a luxury yacht, whatever the application Owatrol has the solution you are looking for.

