You may have seen the current trend of painted arches and wondered how to achieve the look in your own home. So, we’re here to show you just how easy it is! Take a look at our step-by-step guide to learn all about how to create a painted arch.

Supplies
- Tape measure
- String
- Pencil
- Level
- Decorators tape
- Small and medium paintbrush (or swap the medium paintbrush for a small roller)
- Your choice of paint
- Paint conditioner
- Scissors
You could also use a thumbtack or nail and hammer to assist you – more on this later
Tutorial
Before you begin on your painted arch, as we always say – preparation is key!
Make sure that the area in which you wish to paint is in good condition. If you have any holes or dents be sure to fill them in and sand them down once dry. It also doesn’t hurt to give your walls a quick wash to remove any dirt or grease that may be on there – this is especially true if you are painting a kitchen or bathroom wall.
Once everything is completely dry you are ready to go!
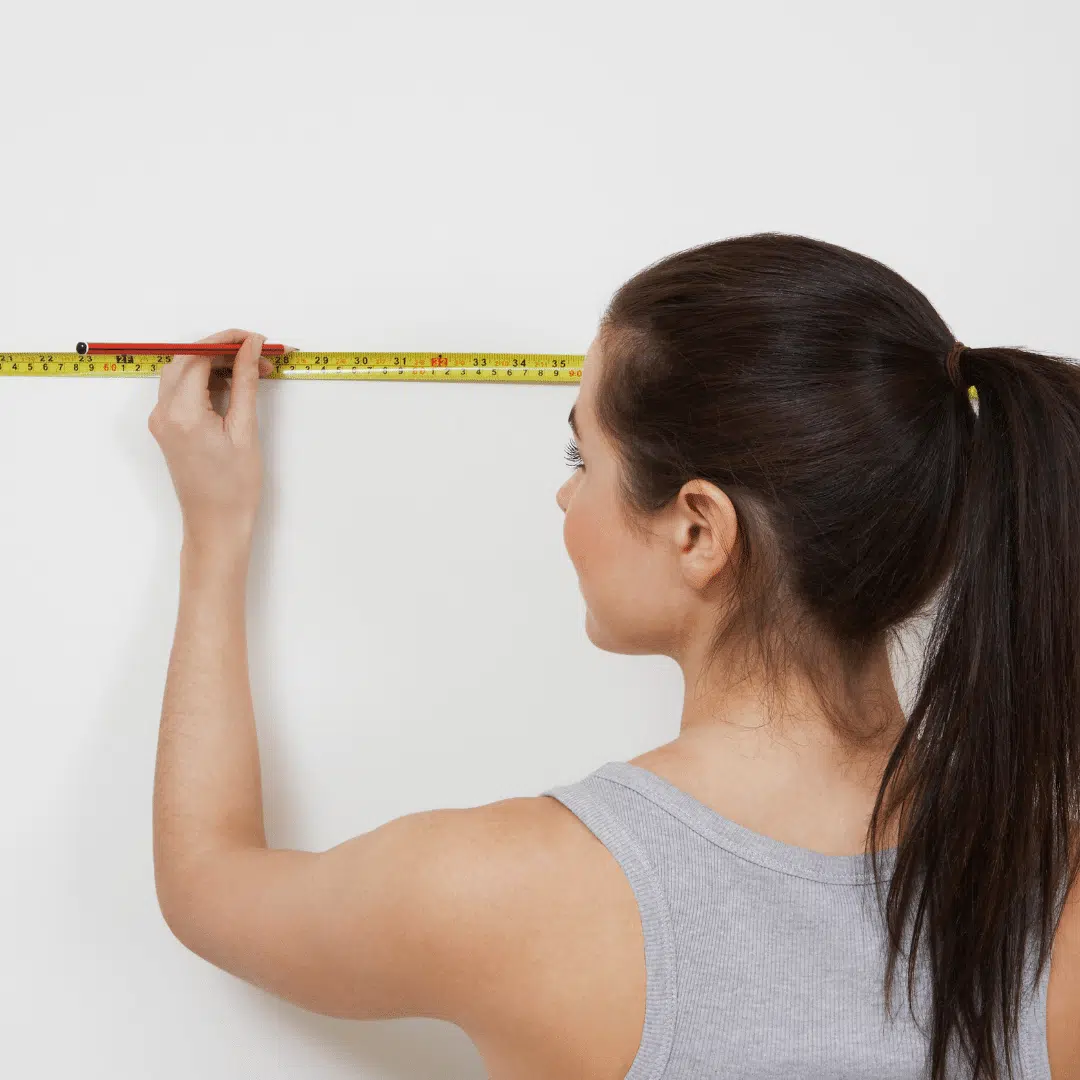
Step 1 – Measuring the height & depth
Begin by measuring out the width of the arch and make a mark with your pencil from where it will begin and where it will end.
Next, place your level on the first mark and use it as a ruler to create a straight vertical line with your pencil to your required height. Repeat the process on the other side.
Step 2 – Measuring the arch
 Once you have your width and height drawn out you are now ready to add your arch. Using your tape measure, find the middle of the top of the vertical lines and make a mark. Next, take note of the measurement from the left-hand side to the centre mark.
Then, grab your string and tie it around your pencil. You will be using this end to draw your arch – secure it with some decorators tape to stop the string from sliding up and down the pencil. Measure the string from where it is attached to your pencil to the centre mark you made previously. You should be able to see that the string will reach both sides of your vertical lines.
Now you have two options. Keeping the pencil end of your string to the outside, you can either hold the other end of your string against the centre mark with one hand and draw the arch with the other, or you could use a thumbtack/nail and hammer to hold it in place for you. The only thing you must consider is that you will be left with a little hole if you decide to use a tool as opposed to holding it in place.
Whichever way you decide to do it, just make sure that the end of the string is well secured in the middle and be sure to keep the string taught to draw a beautiful even arch form one of your vertical lines to the other.
Step 3 – Take a step back!
At this point, we highly recommend that you step back from your wall and take a look at your arch. This is exactly the dimensions that it will be once painted, so if there is anything you want to adjust do it now – it will be a lot easier to do it before you start painting!
Step 4 – Preparing the arch for paint
Once you are happy with your arch, use decorators tape to tape off the left and right sides. Some people will also use decorators tape to create the arch as well as they may not want to freehand it, however, as the tape is straight, it is very difficult (and perhaps not even possible) to get a really neat looking curve.
We also highly recommend you tape off any areas you wish to protect such as skirting boards, plug sockets etc. You should also remove as much furniture as possible to avoid any accidents and use protective coverings for your floor.
Step 5 – Painting the arch
 You are now ready for the fun part – painting the arch!
Before you begin, we recommend using a paint conditioner to assist you such as Floetrol or Owatrol Oil. Floetrol is a water-based paint additive that helps to eliminate brush and roller marks by improving the flow of the paint without changing its inherent quality or characteristics. All you will need is approximately 7-10% Floetrol per litre of paint.
You will want the arch to be as neat as possible, so be sure to use a good quality brush. Take a look at a previous blog post ‘Guide to buying paint brushes‘ for more information on which would be best.
Start on one side at the top of the arch and slowly work your way over to the other in as fewer strokes you can using your drawn curve as a guide. Take your time and don’t be afraid to fill the brush with a good amount of paint – this stops you from needing to go over the same area several times increasing the chances of making a mistake!
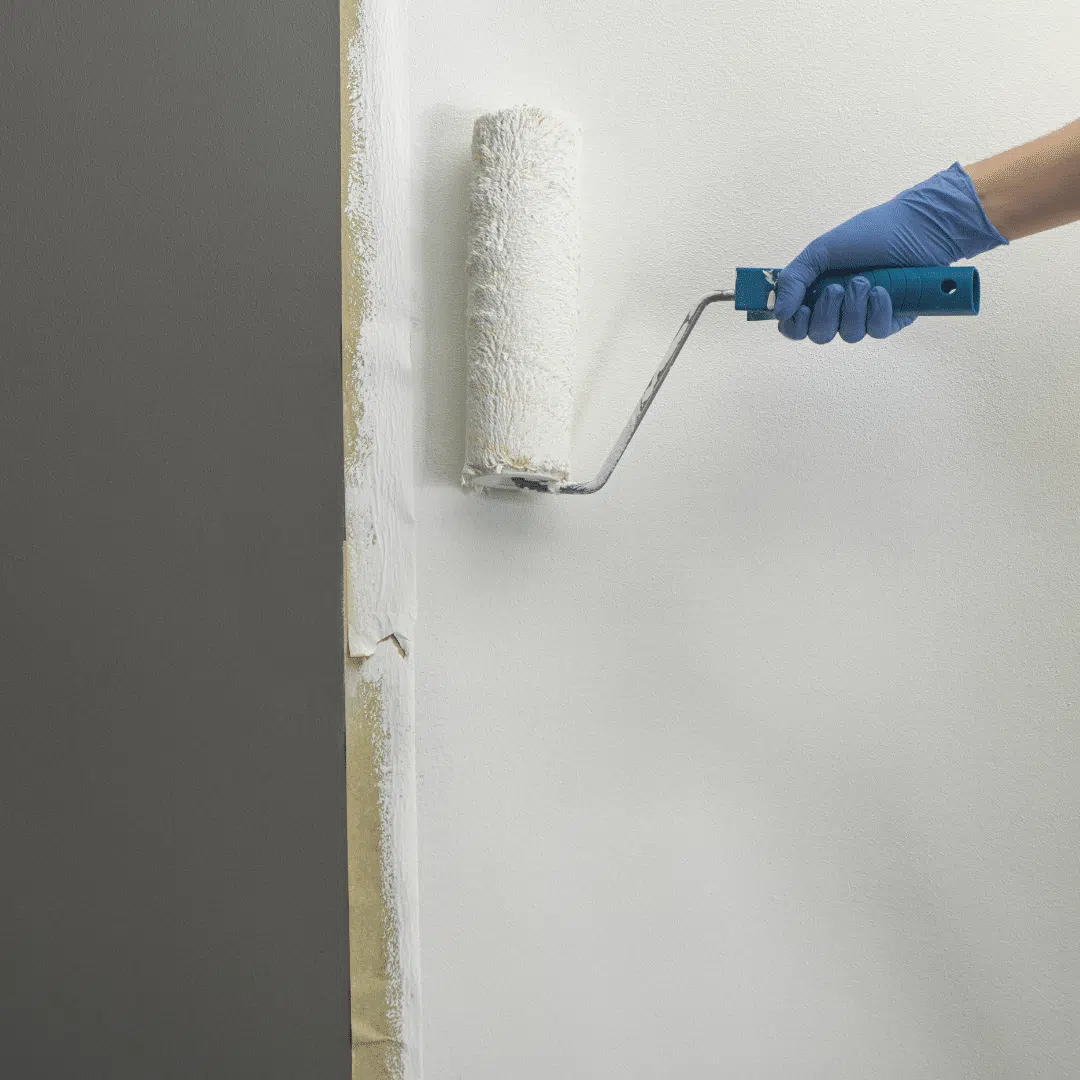 Once you have your arch, you can now paint down the left and right-hand sides as well as the bottom. After all the edging has been done you can use a larger paintbrush or a small roller to fill it in.
Depending on the colour you are using, you may need to do more than one coat. If this is the case, simply repeat this step after the previous coating has dried. Be sure to read the information on the paint tin carefully to know how long you should wait between coats.
Once you are happy with the number of coats you have applied, carefully remove the tape and leave it to fully dry.
Finished result
It’s really as easy as that! Now your painted arch is ready for any furniture, decorations or accessories to really make the space your own.
Gallery
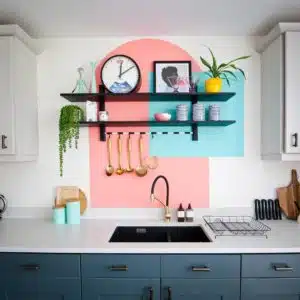
Lissi of thisgirllovescolour.com aka oxfordone on Instagram, has created a beautiful painted arch in her kitchen and doorway. Check them out below and get inspired!

We hope you found this post helpful. If you have any other tips, tricks or advice, please feel free to leave them in the comments below. We love hearing from you!
Want to keep up with all things Owatrol? Why not follow us on social media? You can find us on Facebook, Twitter, Instagram and Pinterest at @owatroluk or at the hashtag #owatroluk

About Owatrol Team
Our team are ready and willing to support you with your requirements whether it is protecting your newly laid deck or renovating a luxury yacht, whatever the application Owatrol has the solution you are looking for.

