
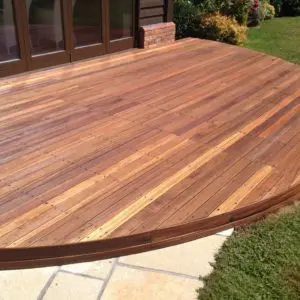
Garden decks create extra living space for you and your friends and family to enjoy. You could use the space for alfresco dining, entertaining, or just for relaxing and enjoying the sunshine!
Where to begin when laying decking:
There are 8 main steps in constructing a garden deck
- Planning your decking
- Materials, tools and safety
- Measure up
- Prepare the ground
- Build the frame work
- Attach any extras
- Fix the boards
- Finish your wood
1. Planning your decking

This first step is something you will want to take a considerable amount of time on. Deciding on the size, shape and style of your garden deck is very important regardless of what you intend to use it for.
Do you want the deck to be attached to your house or set back in your garden? Where will it receive the most/least amount of sunshine? Do you want it to be on ground level or raised up? Will it be just a flat deck or do you want balustrades? Do you want built in seating? The list is endless!
Knowing exactly what you want and where you want it will help you understand the costs and time scales involved.
2. Materials, tools & safety
There are is such a wide variety of woods available that it can be slightly overwhelming!
2.1 Types of wood
Here is a list of 10 of the most commonly used wood for decking
- Pine – inexpensive softwood but prone to scratches and dents
- Fir – inexpensive softwood with a reddish-brown colour
- Spruce – lightweight softwood with a straight grain
- Cedar – softwood with a natural resistance to water, decay and bugs
- Redwood – a premium softwood with high resilience when exposed to the elements
- Walnut – a strong and stable straight-grained hardwood
- Teak – a hardwood with high durability and water resistance
- Ipe – a premium-priced exotic hardwood
- Cherry – a premium-priced hardwood. Unstained it has a rich, beautiful colour
- Oak – very durable hardwood with a distinctive look
- Composite – a mixture of wood, plastic and binding agent
Deciding on your wood can be tricky and can make all the difference when it comes to your budget. There isn’t really a right or wrong answer here, you need to work with whatever suits you best, even if it requires a little bit more maintenance.
2.2 Tools required

You will require a variety of tools at different steps of the deck laying process.
Site preparation tools
- Tape measure
- Spade
- Spirit level
- Builders line or string and pins
- Club hammer
- Edging iron
- Weed control fabric and pegs
- gravel
If you need to create concrete pads you will also need
- Quick-drying concrete
- Damp-proof cause
- Brick trowel
Tools for laying the frame and to cut the deck boards
- Pencil
- Screws
- Bolts
- Decking Joists
- Socket Set
- Combi Drill
- Jigsaw
- Circular saw
- Panel saw
- Mitre saw
- Workbench
- Sandpaper / sander
Tools for laying timer boards
- Timber decking boards
- Decking screws
- Counter sink drill bit
Tools for laying composite boards
- Composite decking boards
- Composite wood decking screws
- Start clips and hidden fasteners set
- Drill bit specifically for composite wood
2.3 Safety first!
- Rigger gloves – for handling the timber
- Protective gloves – if you are mixing cement
- Decorator gloves – for applying a finish
- Dust mask
- Safety goggles
- Earplugs
- Knee pads
3. Measure Up

Measuring out the size of your new deck should not only be done on paper. We recommend laying out some string to the exact positioning of where your deck will be. Seeing it on a piece of paper or on your computer is one thing, but seeing it where it will eventually be will really drive home the scale of the project.
Most people find that seeing it in ‘reality’ makes it look much larger than on paper, so being able to see exactly the scale of the deck is very beneficial.
Once you are happy that the size of the deck you want and that it will fit into the space you have, you’re ready to go shopping!
4. Prepare the ground
Preparing the ground, or ‘oversite’, is vital to the whole integrity of the structure.
If you do not intend on utilising an under deck drainage system (which can be very expensive) then you need to build your deck on an oversite with free draining. The industry standard is a gradient of 1 in 40.
Using grooved wooden boards that run down the slope of the deck will also help with draining. Having them run across the slope means they may collect water and make the surface slippery.
Measure out the site
Measure out the oversite according to your plan and hammer a peg into each of the four corners.
Next, run a builders line from each of the four pegs. Doing this will help you to visualise the site.
Once you have mapped out your site, you are ready to begin!
Clearing away
Be sure to clear away and rocks, weeds and vegetation. Use an edging iron to cut the lawn in a straight line with the required dimensions. Next, use a spade to remove the turf. Doing this also allows you to re-balance your surface if you do not have a natural slope.
Concrete pads
Some people choose to lay their decking frame onto concrete pads. This can help with extra stability but is not a necessity. If you have decided you want concrete pads, then there are a few extra steps you need to take
4.1 Concrete pads
It is essential that your concrete pads are positioned in the exact place and that they are all square for the deck joists.
Work out exactly where the pads are required and then dig holes approximately 150mm square and 150mm deep at intervals of 1.2m around the deck.
Once you have dug out the holes, fill them with quick-drying concrete to just above ground level. Next, use a spirit level and a straight edge (a decking board is perfect for this) and check that the pads are all equal to each other. If they are not, use a brick trowel to help level off the highest points while the cement is still malleable.
Once the concrete pads have hardened off, cover the whole area with a weed control fabric (cutting out areas for the concrete pads) and a layer of gravel 40-50mm deep.
Finally, cut out n lay squares of damp-proof course to sit in between the concrete and the deck joists.
4.2 Laying straight onto the ground
If you are laying your frame straight onto the ground, simply cover the oversite with a layer of weed control fabric and then a layer of gravel 40-50mm deep.
5 Build the framework

Depending on what type of deck you are building will depend on how you will need to construct your framework.
5.1 Ground level deck
Firstly you want to measure your deck frame, loosely assemble it to the size you want and then lay it on the oversite.
Once you have done this, we recommend you lay your decking boards down onto the frame to check that the boards will sit flush with the end of the frame. Doing this correctly will ensure that you won’t be left with a slither of a board at one end!
If necessary, you may prefer to extend or reduce the size of your frame to accommodate the decking boards to allow them to sit flush and neat.
Remember, different types of wood will require a different amount of space between each board.
For instance, timber boards will require approximately 5-8mm gap for expansion along the length of the boards and a 3mm gap along the ends. Where as solid composite decking boards will require approximately 6mm for an expansion gap along the length of the deck boards and a 3mm gap along the ends.
You could use something like a spacer or piece of metal that is of the similar size of thickness, to measure along and assure a uniform gap between the boards.
Once you have worked this all out, you are now ready to cut your frame to size, assemble, and if necessary, add you concrete pads.
Preparing for Assembly

To assemble the frame together, make marks with a pencil on the two outer joists – this is where the screws will go. Make sure to align these screws with the centre of the adjoining outer joists.
You will then be left with 8 marks in total – two on each corner.
Next, using a flat wood bit, drill countersunk holes into each of these pencil marks. Make sure these countersunk holes are at the depth of the coach screw’s head but also wide enough so you can use a ratchet or socket attachment so you can tighten them.
Creating countersunk recesses will allow for the screw heads to sit flush with the joist finish. It will also allow you to quickly and easily attach a fascia should you wish.
Swap over your drill bit for one that is thinner than your coach screw’s shank (the section with no thread that starts immediately after the head). Then create pilot holes into the countersunk holes, from the outside, into the adjoining joist post.
Pilot holes help guide the screw into the wood and prevent the wood from splitting.
Assembly
You can now assemble the frame. Use a socket attachment on a drill driver or a ratchet to help tighten the coach screws into place. We recommend you drill and secure one corner at a time.
Once the outer frame is assembled and in position, it’s time to secure the inner joists.
Simply repeat the process to secure the two coach screws through the outer frame and into each end off all the inner joists
The spacing of the inner joists will depend on your decking design and size.
5.2 Raised deck

For a raised deck you will need to create a sub-frame. This frame has joists that run in the opposite direction of the boards and so it is imperative that you have decided on your deck’s design.
Measure and cut the outer joists of the sub-frame to the required length. Coat the ends in an end grain wood preserver to stop the wood from rotting.
If you are attaching your deck to a wall, attach the sub-frame joists to it with metal joist hangers and galvanised nails of around 50mm. To avoid any splitting, drill pilot holes for the galvanised nails.
However, if you are not fixing your deck to a wall, you will need to fix the joists to all the corner posts instead.
Fixing joists to corner posts
Fix the side joists to the off-set corner posts. Be sure to check that they are level. The joists will need to protrude by the width of a decking post to allow for a balustrade or railing post to be fixed into the frame work.
Drill pilot holes through the joist and into the post. Next, countersink the holes by using a flat wood drill bit. Make sure the hole is large enough to hide the entire screw head. Then, simply attach the two coach screws by using a socket set on a ratchet handle or a drill driver.
Continue doing this around the entire deck, fixing all the joists into each post with two coach screws in each.
If you would like to add extra strength to the sub-frame, you can screw two support beams onto every second post. These will need to be positioned beneath the joists of the sub-frame.
Finally, cut the inner joists to the appropriate length and attach them to the sub-frame, again, with two countersunk coach screws at either end.
If you are planning on laying timber boards horizontally, the distance between the centre of one joist and the next should be a maximum of approximately 450mm. If you are planning on laying timber boards diagonally, the centres need to measure approximately 300mm.
6 Attach any extras
If you have a raised deck and you will need to attach a balustrade and stairs.
6.1 Balustrade
Planning
You need to attach a balustrade after you have built the sub-frame but before laying down the deck boards. This is important as the decking posts slot in and are fixed to the corner posts, then the decking board fit in around them.
First of all, you need to work out how high you would like the balustrade to be and cut the wooden spindles if necessary.
Decide on how you would like to space the deck posts (it is recommended to have them a maximum of 1.2m apart), then cut both the base and and hand rails to length.
Don’t forget to allow space beneath the base rail for the deck boards.
Next, clamp a section of the base rail in a workbench (if available) and drill pilot holes of around 100mm apart all the way through the rail.
Assembling

Slot each of the spindles into the underside of the handrail, securing them into place with screws placed diagonally through the spindle and into the rail.
To make this part easier and more accurate, we recommend you measure each section with a spacer that you can make from a piece of off-cut wood.
Once this is done, fit the base rail onto the spindles and use 50mm deck screws through pilot holes into the bottom of each spindle.
Next up you will need to slot in a deck post between the joist support post and the corner of the sub-frame.
Attach the post to the sub-frame with two coach screws that have been countersunk (just like before).
Get the next deck post into position and attach it with only one coach screw for the time being.
Now you will need to measure up where the handrail will sit on the deck post. Calculate where the handrail will attach and drill two holes into the post and two holes into the handrail where they will neatly meet together.
Attach wooden dowels into the holes of the handrail with glue and push the handrail into the deck post, assembling it all into place.
We recommend using quick-release clamps to hold the posts and balustrade together until the glue dries.
Once everything is in position, add the other coach screw to the base of the second post to secure everything in place.
6.2 Stairs
The simplest and easiest way to insert steps into your deck is to buy a pre-formed kit. You can find these in most DIY stores and are available in a variety of step options.
If, however, you want to build your own you must first check that the site your steps are going to go on is level and firm.
If there is no hard landscaping, consider laying an area of concrete or perhaps paving slabs. You will need the ground to be even and firm otherwise the steps will not be secure and could even sink into the ground.
Cut two sections of the joist to the same width as the tread steps.
Next, attach them to the step risers at both the top and bottom using two countersunk coach screws on each side.
Once assembled, position the steps against the sub-frame in the centre of the step support area.
Make sure that you have positioned it so that the longest edge of the stair is on the paving slab and the shortest is against the deck.
Drill pilot holes into the step assembly and the sub-frame joist. Screw it securely to the sub-frame with four more countersunk coach screws.
Then, drill pilot holes and screw the treads into the rise supports at either end using two 50mm deck screws.
If you would prefer to have a solid stairway to an open stair, simply fill the gaps with joist off-cuts or decking boards.
Do this by measuring the height and depth of the gap and then screw the timber into the step riser with two screws at either end.
7. Fix the boards
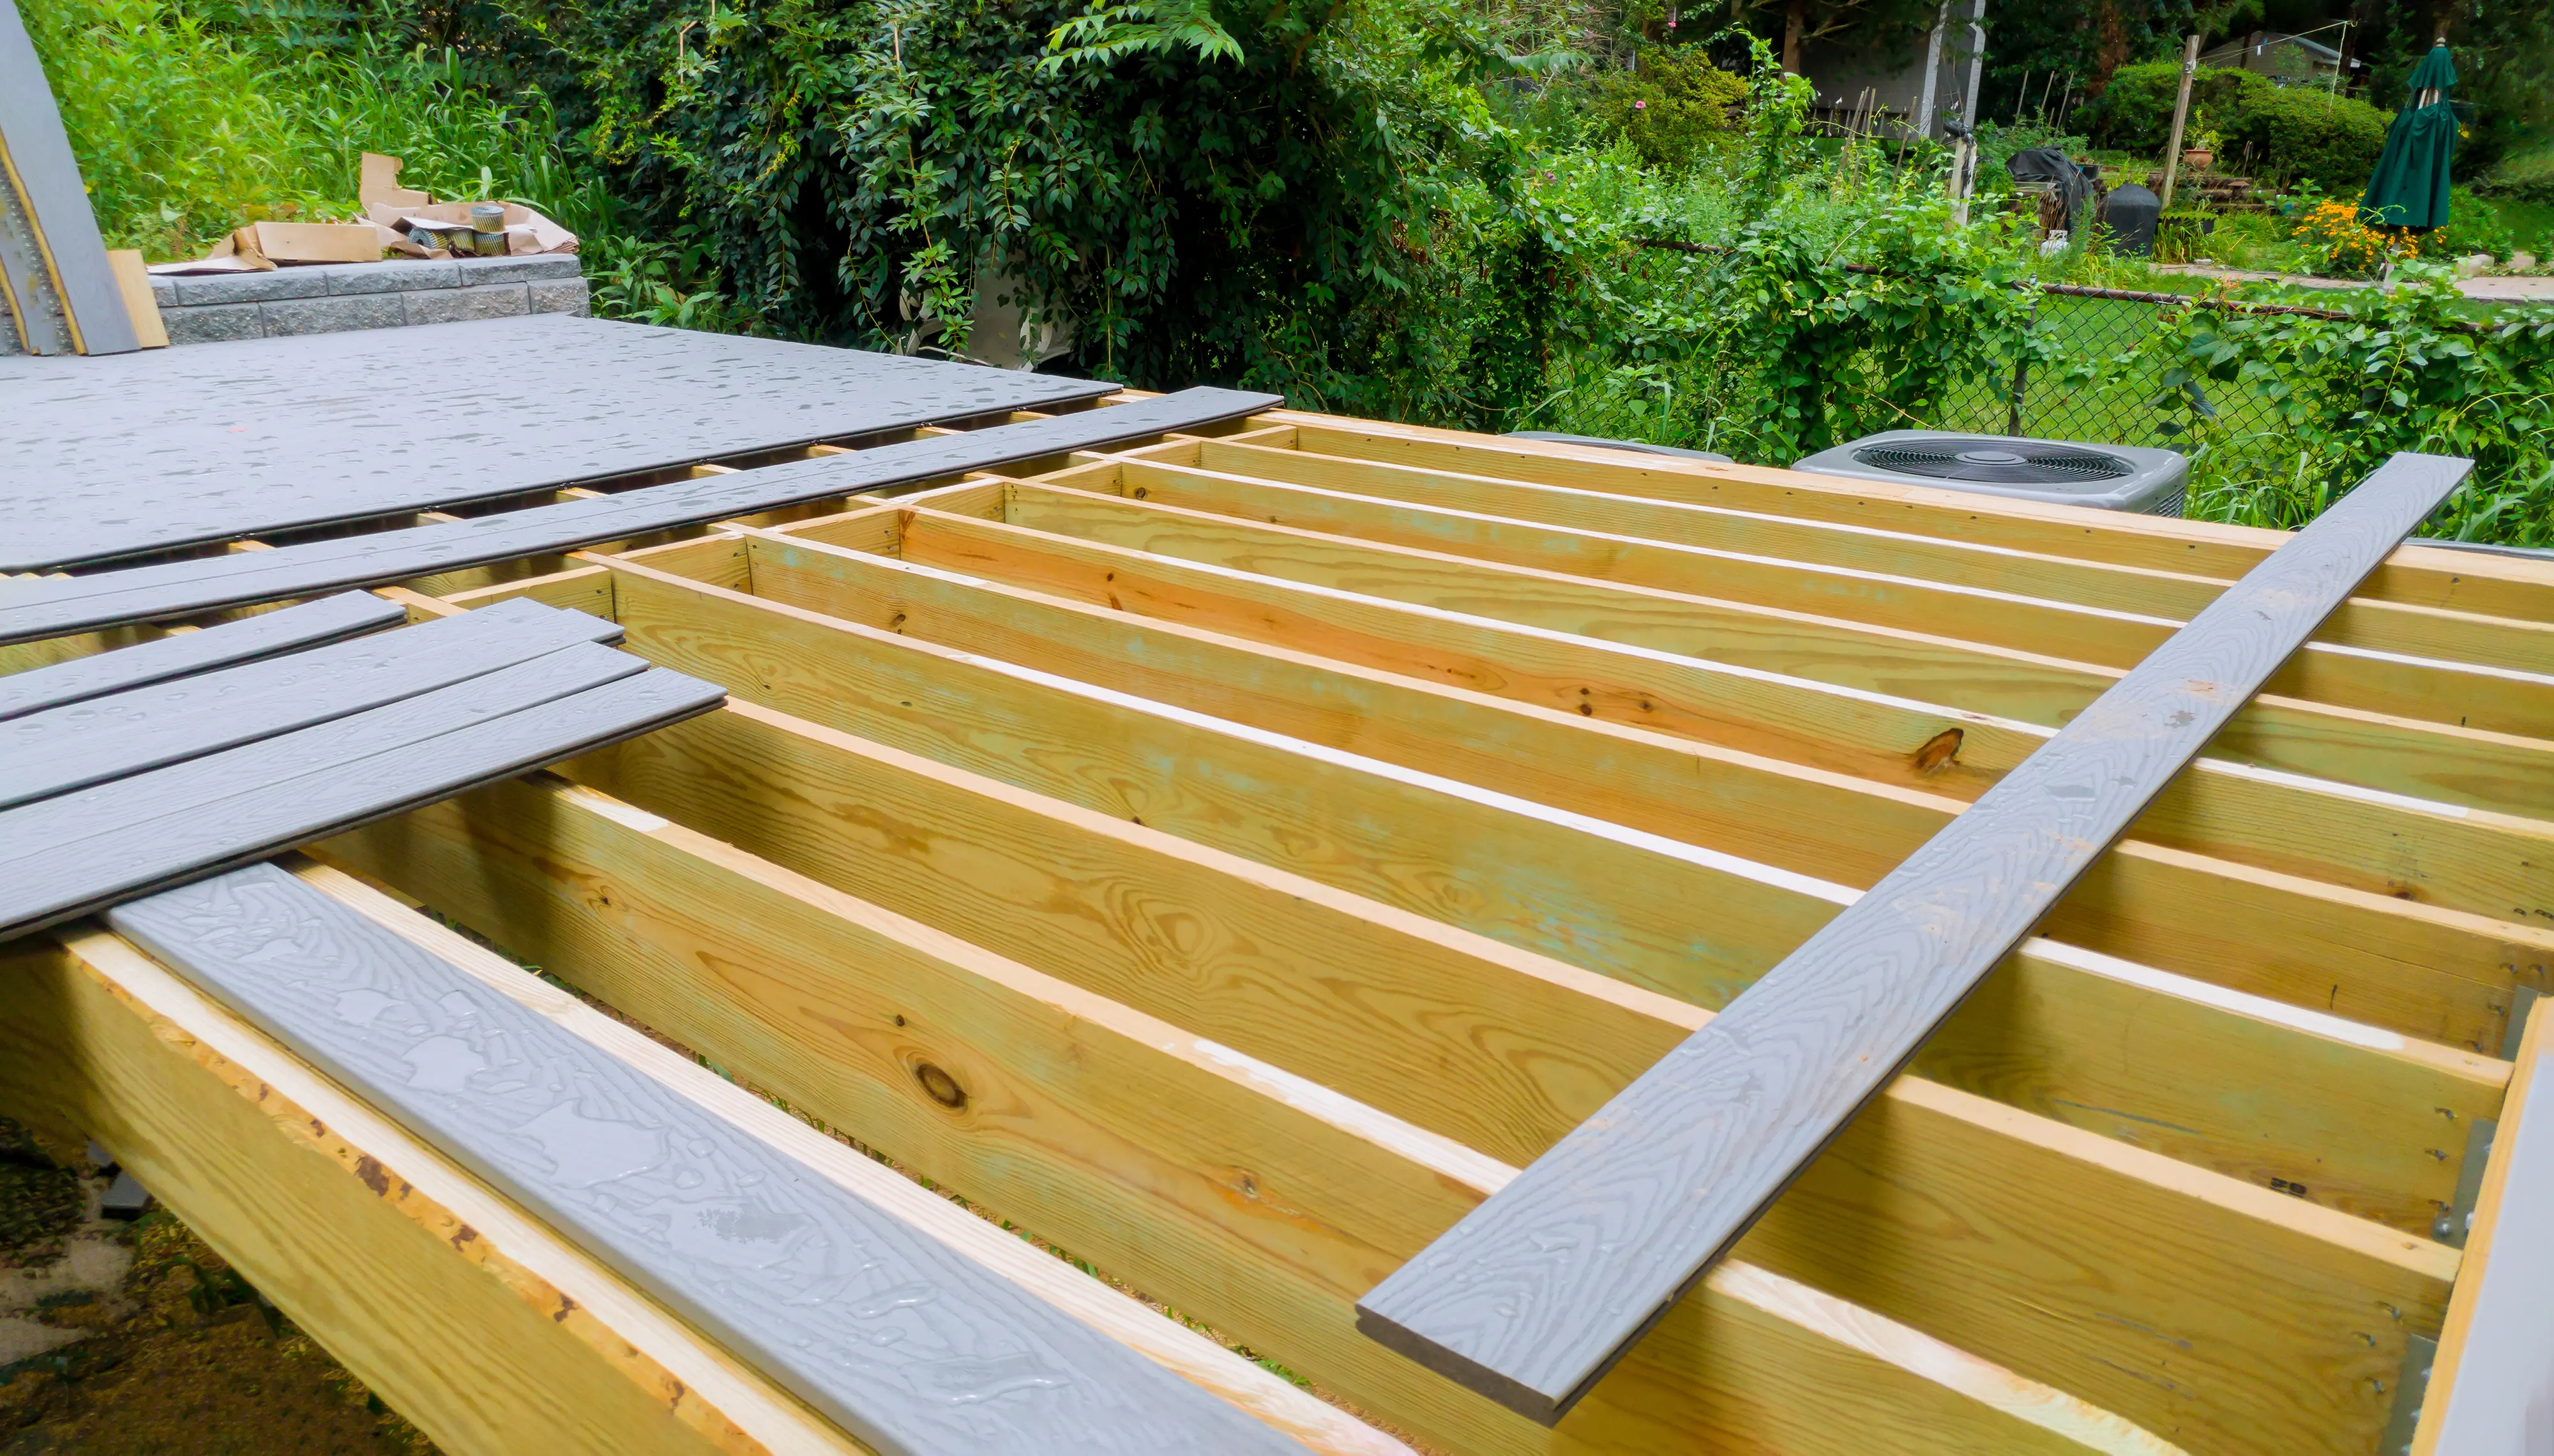
Again, depending on the deck you are assembling will depend on how to fix your decking boards into position.
7.1 Ground level deck
To fix your boards to your decking frame, start in one corner and position the first board across the inner joists (so the deck board is in the opposite direction of the inner joists). The board should be flush with the frame.
Be sure to position the end of end joins between the boards halfway across an inner joist. This will mean that both boards can be screwed into the joist for extra stability.
When cutting any boards, make sure to allow for an expansion gap of 3mm for when the boards are laid end to end.
You’re now ready to secure your board into the joists.
Securing the joists
The decking board must be secured to every joist that it covers along the sub-frame. Make sure to use two decking screws where each board meets a joist.
Ensure the screw locations are at least 15mm from the end of the board and at least 20mm from the outside edges.
If your decking boards is grooved, insert the screws into the bottom of the groove to allow the finish to the flush.
Once you have secured the first row into place, you can then continue with the rest, remembering to include the appropriate expansion gap between each board.
Try to stagger the deck board joins across the deck (his will add greater strength) and arrange them in a pattern for an attractive finish.
If necessary, use sandpaper or a sander to smooth over any cut ends.
Once the ends are smooth, apply an end grain preserver to protect the wood from rot.
Your deck is now ready for a finish.
7.2 Raised deck
Once your railings are in position you are now ready to lay down the deck boards.
Remembering to run them in the opposite direction of the joists, lay them from the outer edge of the sub-frame and move inward.
You will first need to cut notches into the board to fit around the deck posts. Cut the board to the correct length and clamp it in front of the deck posts, overhanging the sub-frame.
Carefully measure and mark the outline of the deck posts exactly onto the board using a set square.
Pick up the board and clamp it into a work bench, if available.
Cut out the shape using a jigsaw, then treat the cut edges with an end grain protector.
Slot the board into position and if necessary, plane or saw down its outer length. This will ensure the inner edge is flush with the inside edge of the decking post and give you a straight edge to lay the rest of the boards.
To lay the rest of your deck, see section 7.1 ‘ground level deck’.
8. Finish your wood

Once your deck is finished you can now choose your finish.
This is a very important step and shouldn’t be overlooked. All your hard work and effort can be ruined come the winter by having unprotected wood.
We stock a wide variety of exterior wood finishes, from simple wood oils that allow your woods natural beauty to shine through, to opaque wood finishes to make it a statement piece.
We hope you found this post helpful and now know a little more on how to lay decking. If you have any other tips, tricks or advice, please feel free to leave them in the comments below. We love hearing from you!
Want to keep up with all things Owatrol? Why not follow us on social media? You can find us on Facebook, Twitter, Instagram and Pinterest at @owatroluk or at the hashtag #owatroluk

About Owatrol Team
Our team are ready and willing to support you with your requirements whether it is protecting your newly laid deck or renovating a luxury yacht, whatever the application Owatrol has the solution you are looking for.

