Have you ever wanted to build a raised garden bed but are unsure about how to go about it? Well, we’re here to show you how!
Building anything from scratch can seem a little daunting, but we’re here to show you just how easy it is to build your very own raised garden bed!
There are many different types of a raised bed and a wide range of materials you can use. But today, we’re going to explain below how to build a stand low level raised bed.
Standard low level raised garden bed
The standard low level raised garden bed is one of the simplest and easiest to make.
The tools you will require are;
- Measuring tape
- Pencil
- Metal Stakes
- String
- Spirit level
- Saw
- Wooden Planks
- Wooden Stake
- Wood screws
- Electric screwdriver
- Metal corner plates (optional)
- Spade
- Protective finish

As always, we recommend that you plan and prepare the area in which you want your raised bed to go before you start.
Planning and preparation
When deciding on the size of your raised bed, you may wish to consider keeping it to a size where you can reach the centre from all sides.
This is so that you will never have to step on the soil inside the bed. You want to try and keep the soil as least compact as possible so your plants can thrive.
Once you have decided on the size and where you want it to go, use your measuring tape to mark the length and width.

Then, use your metal stakes to show where the corners will be. Tie one end of your string to one of the stakes and walk around the perimeter, making sure the string hits ever stake.
Tie the string off on the same stake you started on and you will have a much clearer and better understanding of where the garden bed will be.
Once you have your area clearly marked out, measure your planks and make sure that they are to your size specifications. If they need shortening, use a saw to cut them to size.
Installation

Next, take your stakes (which again are cut to your size specifications) and be sure to have them at least 30cm deep into the ground.
We recommend using a spirit level to make sure that all the stakes are in the ground at the same level.
Then, simply place your planks around the stakes and secure them into the stake with wood screws. You can choose to countersink the holes for a smoother clean look, or you can attach metal corner plates to each corner to ensure they are safely connected.
Then, all that’s left to do is use a protective finish. We have a wide variety of wood care finishes available to ensure you get the finished look you desire.
Inspiration
Do you love the idea of a raised bed but were thinking of something a little bit more different? Great!
There are so many other different types of a raised garden bed, so below we want to show you a few of our favourites!
Multi-levelled garden beds

Multi-levelled garden beds are a very popular choice. They look great in a wide range of gardens and are very practical.
As they not only offer a variety of depths of soil, you can also have various types of soil in each compartment, meaning you can grow a wide range of fruits and/or vegetables that have different requirements.
The best thing about this style of garden bed is that you can easily tailor it to suit your needs. You can even add or take away parts each year!
To build a multi-levelled garden bed, simply follow the same steps as above, but take into consideration the different compartments you want.
If, for instance, you want to grow carrots, you will want one of the beds to be tall enough to accommodate the vegetable as they grow.
Likewise, if you plan to grow herbs, you will not need deep soil and so can have a very low compartment.
This really is down to you and what it is you want to grow.
Freestanding garden beds

A free-standing garden bed is has a much more contemporary look to it. It is much more of a statement piece and can be very striking if painted bold colour or has some bright eye-catching plants growing inside.
Building a bed like this is again very similar to before, but has a little bit more to it.
As pictured above, when building a free-standing raised bed you could opt to have the wooden planks set further apart. This helps to break up the wood so it’s not such a big block of colour and looks much more pleasing to the eye.
Once assembled, you can add a black liner to the sides of your box to keep the soil from falling out through the slots. Remember to not place a liner on the bottom though as this will prevent the water from draining away and your plants could get root rot.
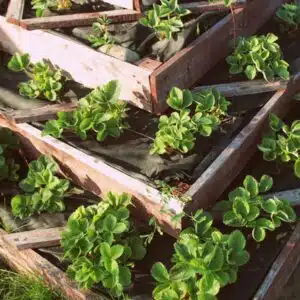
Re-purposed garden beds
We love seeing things being re-purposed! We love the seeing an everyday object utilised for something it was never supposed to be used for.
A few of our favourites are;
- Oil drums
- Tyres
- Wheelbarrows
- Shipping crates
- Fruit crates
- Bathtubs
And more! There are so many everyday objects or things that are doomed to the rubbish tip that can be used as a raised bed – you just need a little imagination to see it’s potential!


We hope you have found some inspiration here today and will now go on to make your very own raised bed!
If you have any other handy tips or advice, please feel free to leave them in the comments below.
We love hearing from you! If you share your project on Twitter, Facebook, Instagram or Pinterest please feel free to tag us @owatrolUK or use #owatrolUK so we can see and share your hard work!

About Owatrol Team
Our team are ready and willing to support you with your requirements whether it is protecting your newly laid deck or renovating a luxury yacht, whatever the application Owatrol has the solution you are looking for.


Please advise what product should I be using, if any, for new sleepers ( sold as treated) on a raised bed for vegetable growing
Hi there Jen,
We would normally recommend using Seasonite to protect the wood and let it weather for 6-12 months before applying a finish, however, if your wood sleepers are made of hardwood such as Oak, then Seasonite would not be suitable.
If, however, the wood is a softwood then this is an option you could use. Once it has weathered safely with Seasonsite: https://www.owatroldirect.co.uk/product/seasonite/ for 6-12 months, you could then apply an oil finish such as Textrol: https://www.owatroldirect.co.uk/product/textrol/ or Deks Olje D1: https://www.owatroldirect.co.uk/product/deks-olje-d1/
I hope this was of some help, please feel free to email us at: sales@owatroluk.com or give us a call on: 01582 585266 and we would be more than happy to assist you further.
All the best,
The Owatrol Team